
Azure Arc is Microsoft’s all-encompassing tool for managing your hybrid and multi-cloud infrastructure. It unifies your environment and provides a single-pane-of-glass view of your asset estate.
In this post we’ll be focusing on Azure Arc-enabled servers – one of several Arc components. This feature lets you onboard your non-Azure Linux and Windows machines, whether they are physical servers or virtual machines.
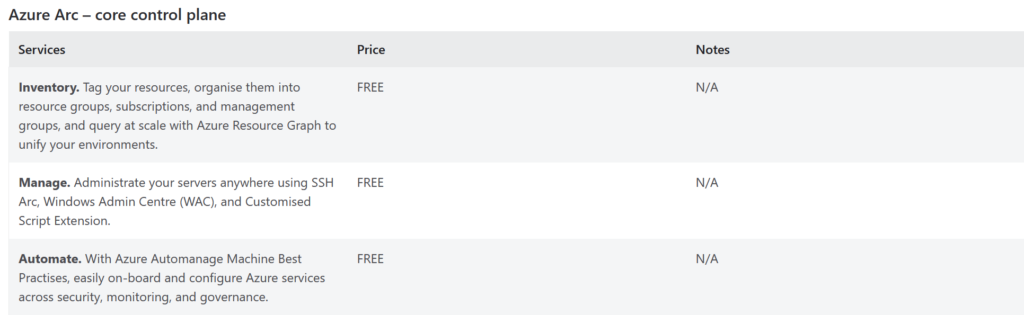
For those of you who (like me) run a home lab, or are eager to try Azure Arc, then now is the perfect time to dive in! The basic features of Arc-enabled servers are available for free. The core control plane offers free inventory management with resource tagging, organization, and larger-scale querying.
Preparing to onboard to Azure Arc
First let’s briefly explore some of the requirements for onboarding a server to Arc. You can onboard servers either interactively or at scale:
| Onboarding Method | Description | Suitable For |
|---|---|---|
| Interactively | Manually onboard individual servers using the Azure portal, CLI, Windows Admin Center, or PowerShell. | Small environments and testing purposes. |
| At scale | Onboard automatically and at scale using service principals, group policy, Ansible, and more. | Medium and Larger scale environments. |
The exact requirements for deploying to Arc depend on your chosen deployment method, which is why I recommend visiting the Plan for deployment documentation as in this post we’ll be interactively onboarding a single machine using PowerShell.
The Azure Connected Machine agent is required to connect machines to Arc. This agent is the critical piece that bridges the gap between Azure and your on-premise or multi-cloud environments. After installation your server will be represented as a resource within Azure.
Both Windows and Linux machines are supported by the Connected Machines agent. For a complete list of the supported platforms (includes Linux), visit the Supported operating systems documentation. In this post we’ll install the agent on a Windows Server 2019 VM. Windows is widely supported, with the agent being compatible for:
- Windows Server 2008 R2
- Limited support.
- Visit here for further details.
- Windows Server 2012
- Windows Server 2012 R2
- Windows Server 2016
- Windows Server 2019
- Windows Server 2022
- Windows Server 2025
Finally lets ensure the required Azure Resource Providers are registered under our subscription. To keep it simple, resource providers equip Azure with the tools it needs to handle various resources. For the purpose of this post, we’ll be registering the first three resource providers (the remaining 2 are for additional Arc functionality):
- Microsoft.HybridCompute
- Microsoft.GuestConfiguration
- Microsoft.HybridConnectivity
- Microsoft.AzureArcData (for Arc-enabled SQL Servers)
- Microsoft.Compute (for Azure Update Manager and automatic extension upgrades)
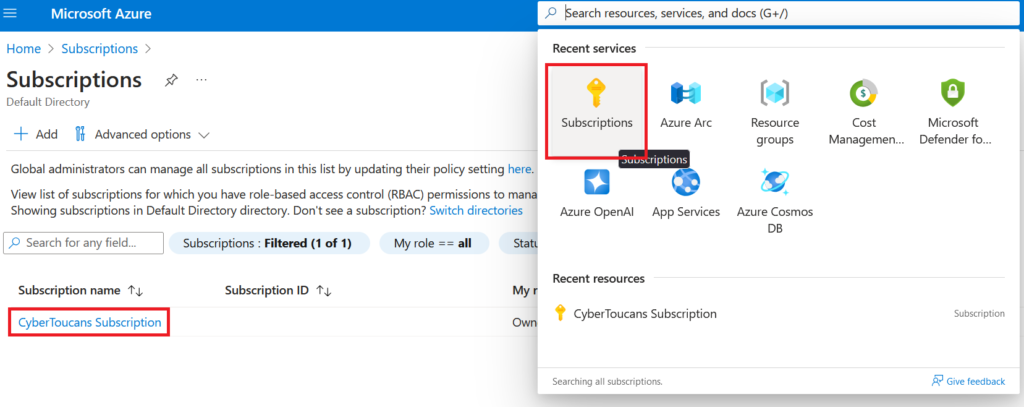
To validate these are registered first navigate to Subscriptions and select your subscription.
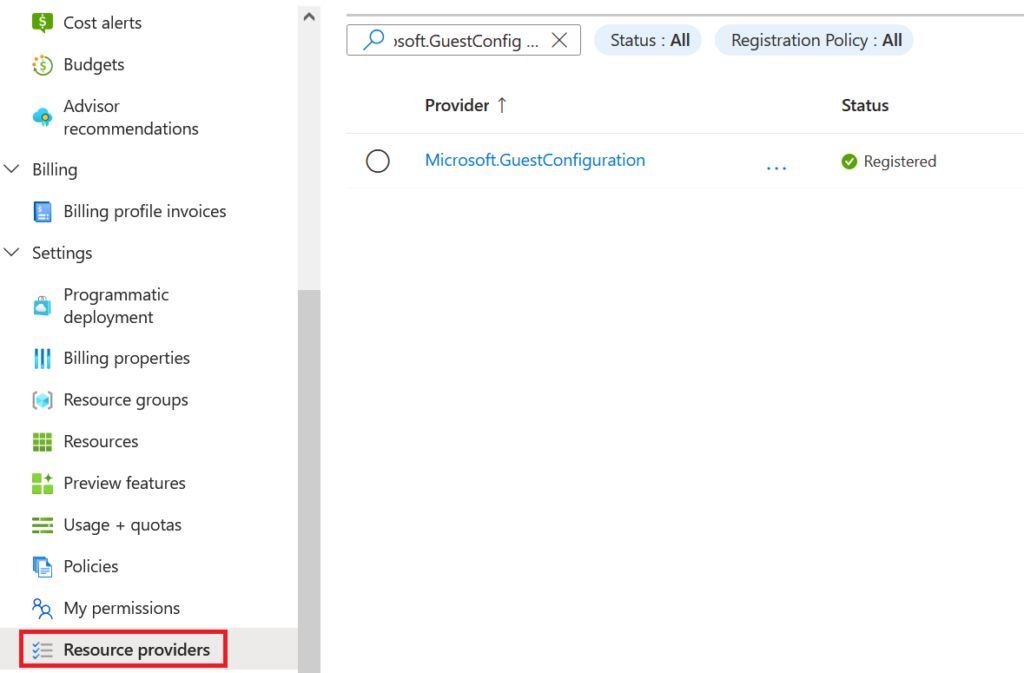
Under Settings select Resource providers to search and validate they are registered.
Generating the onboarding script
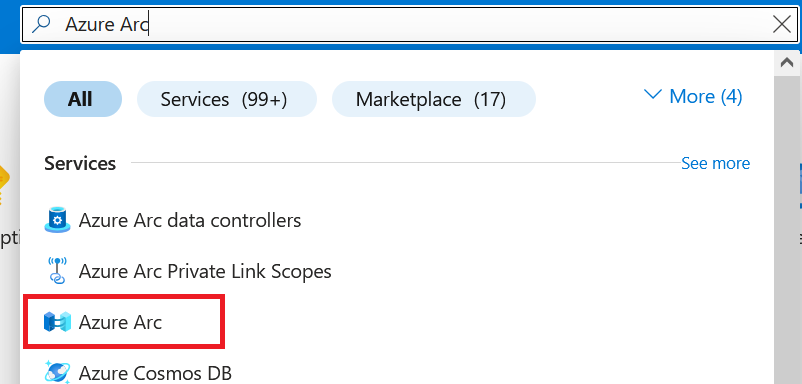
Now we’re ready to start onboarding. Let’s begin by navigating to Azure Arc.
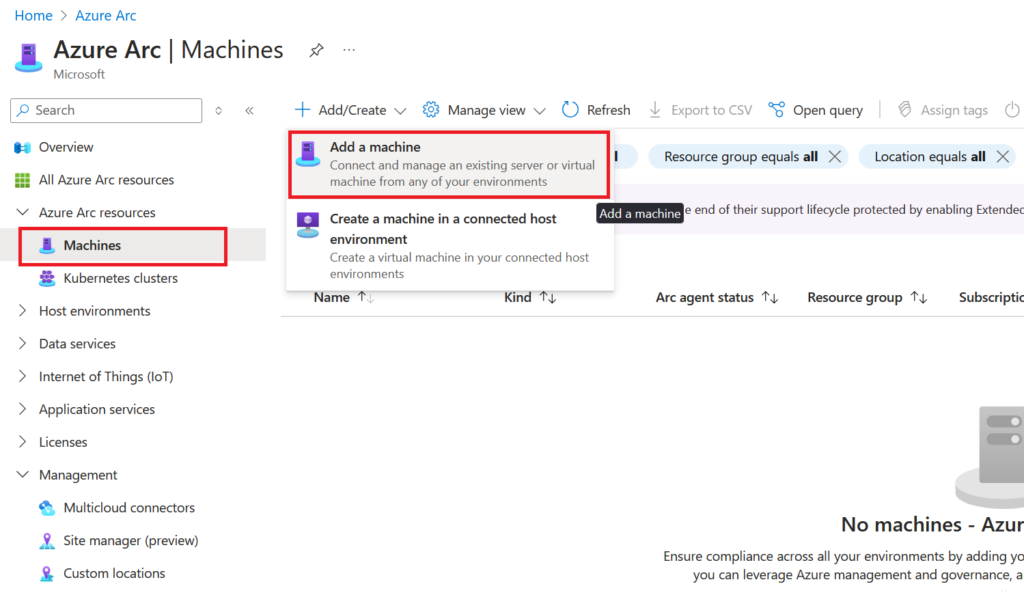
To onboard our first device select Machines under Azure Arc resources. This brings us to an (empty!) inventory view. From the navigation bar at the top select Add/Create and then Add a machine.
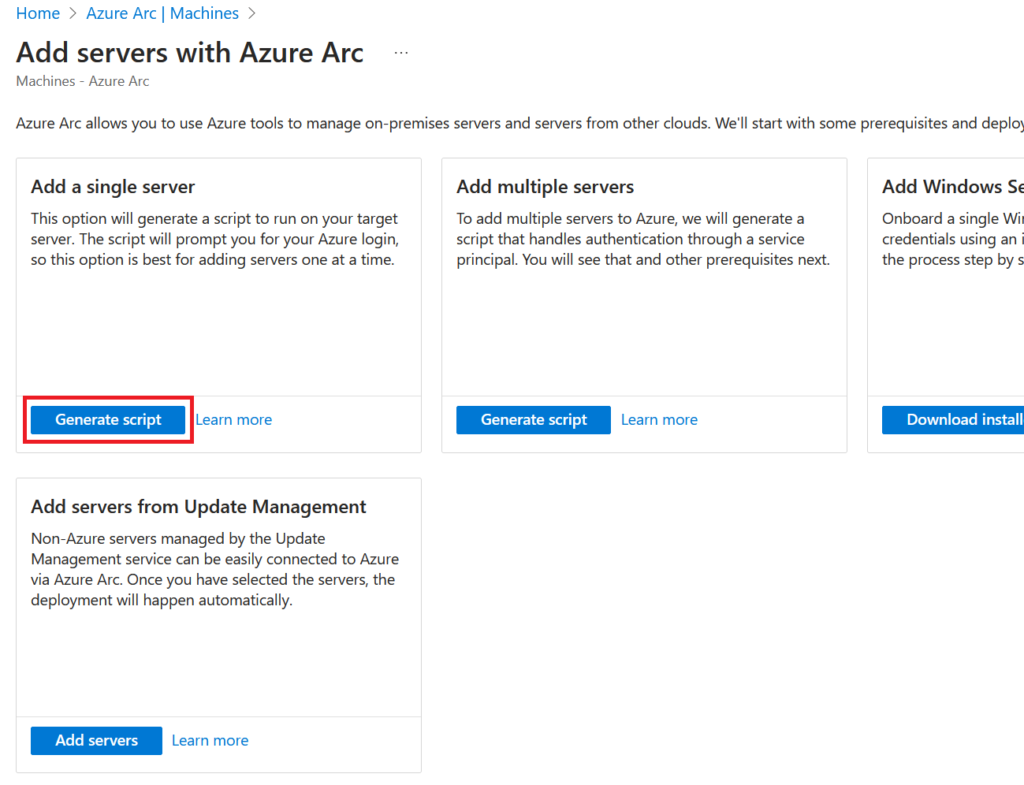
From here you can choose an onboarding method (as discussed earlier). We’ll be keeping it simple by adding a single server, which we’ll later authenticate with our Azure credentials. Select Generate script.
Alternatively if you are onboarding at scale I highly recommend exploring the Add multiple server option. This uses a service principal for authentication – which is far more secure, managable, and scalable than using traditional user credentials. This won’t be covered in this post (expect a new post on this topic soon 😊).
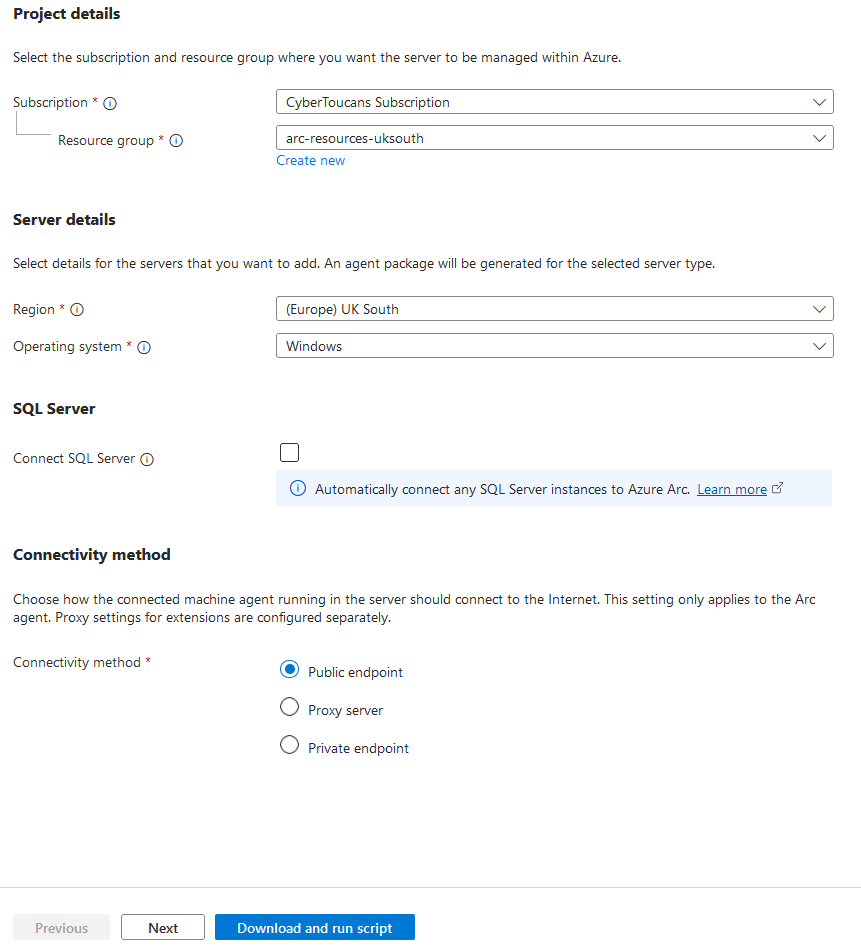
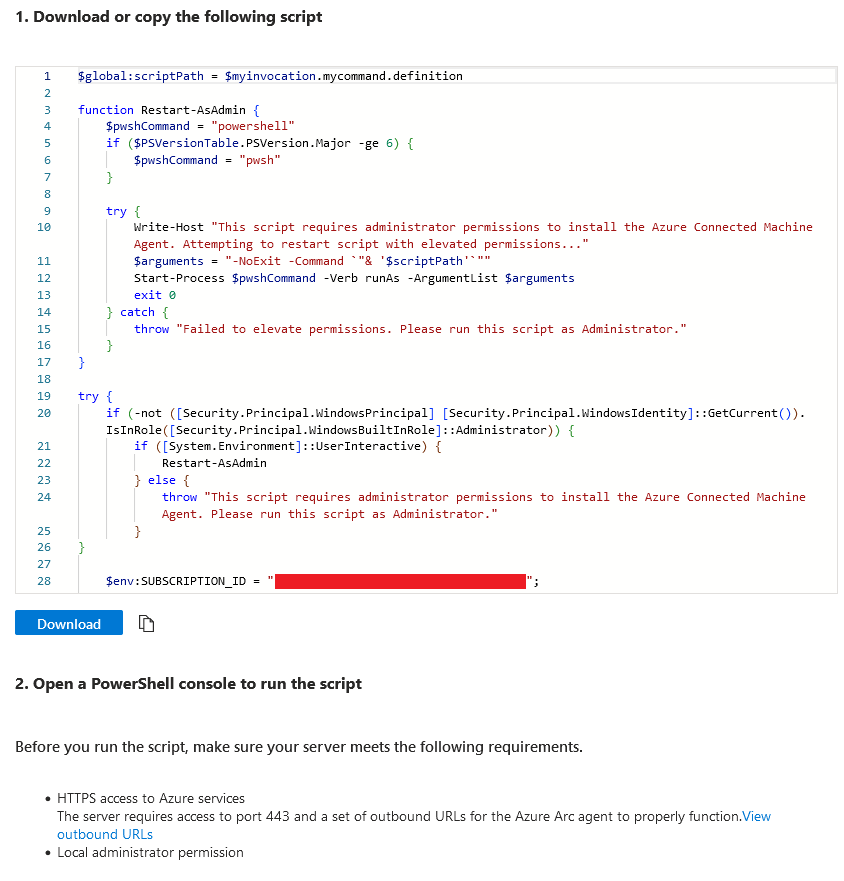
To generate the script provide details on the resource group, region, operating system, and connectivity method. As we’re using a public endpoint for connectivity we require no further configuration. However if you are using either a proxy or private endpoint, review the Network requirements to ensure you have connectivity to the required URLs. Once completed select Download and run script. Optionally you can configure tags on the next page.
After generating the script you can either download it, or simply paste it into PowerShell on the target machine.
Running the onboarding script
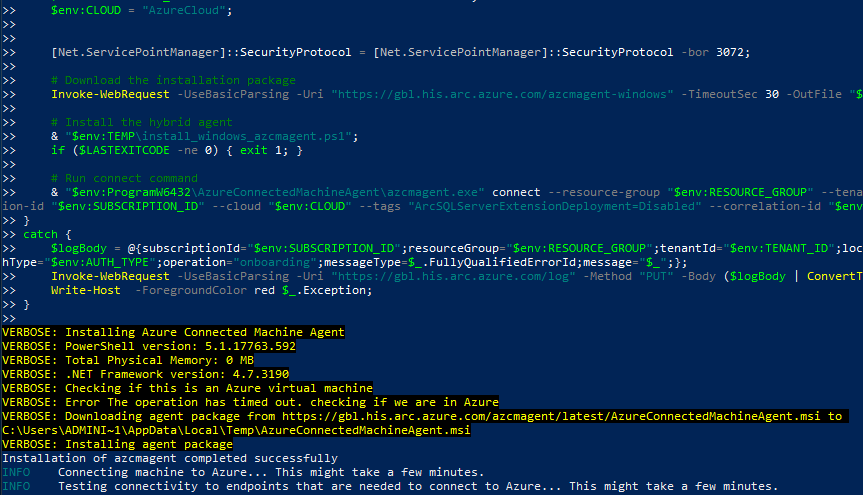
Moving over to our virtual machine we can execute the script with PowerShell. Running the script installs the Azure Connected Machine agent and starts to onboard the device.
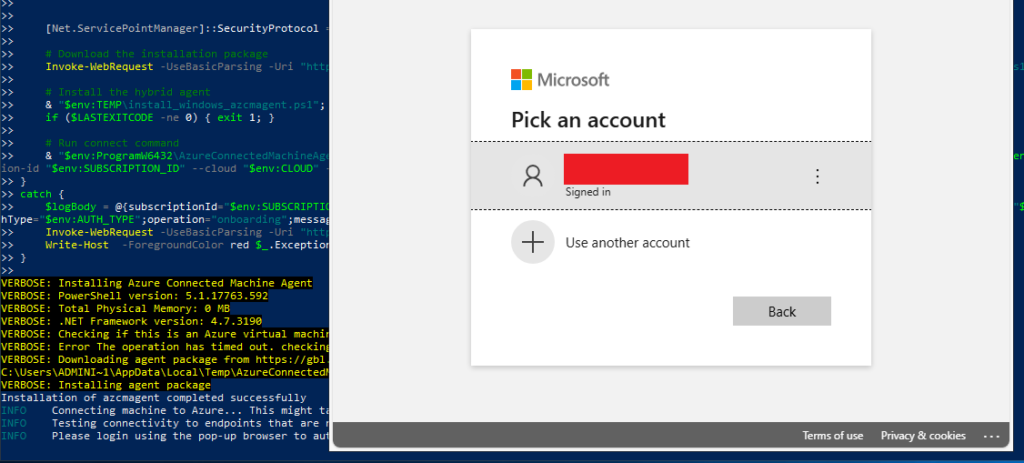
After a few minutes we’ll have to authenticate using our Azure credentials.
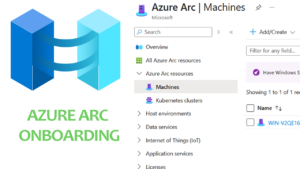
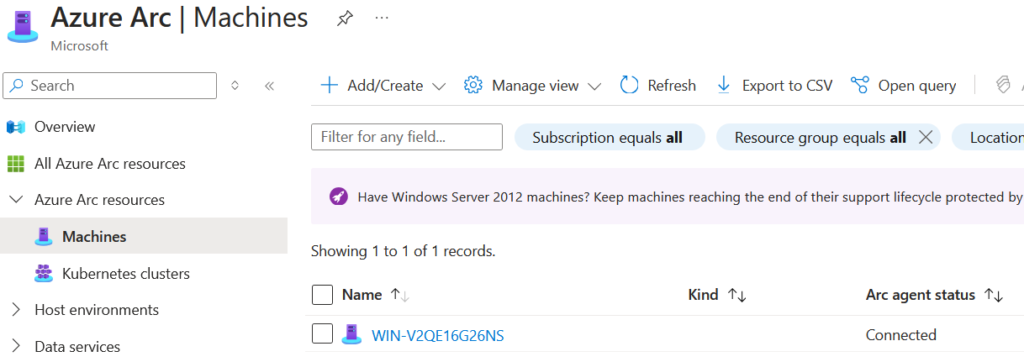
Success! Once authenticated the machine will appear in Azure Arc under Machines.
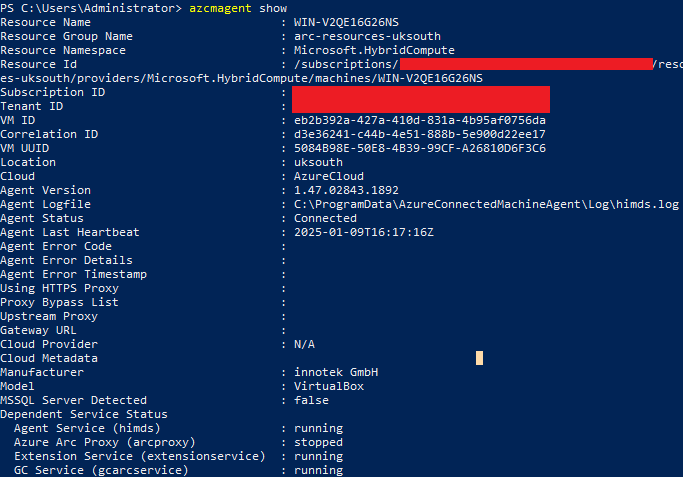
For additional verification, you can use the following PowerShell command to verify connectivity:
azcmagent show
Wrapping up
Now that our machine is onboarded, the real fun can begin! Start exploring the operational functions to control your machine:
- Governance
- Ensure compliace by auditing setting with Azure Policy and Azure Machine Configurations.
- Protection
- Protect and strengthen non-Azure servers with Microsoft Defender for Endpoint.
- Configuration
- Automate repetitive management tasks with Azure Automation.
- Manage operating system updates for your Linux and Windows machines using Update Manager.
- Monitoring
- Gain insights into operating system performance with VM insights.
- Collect detailed system log data and events with the Azure Monitor Agent.